Overview
The Queues section allows you to view, manage, and configure queue-level settings. It is useful for aligning workflows with pipeline stages once calls are transferred to a queue for data capture and reporting.
With quick access and built-in search functionality, managing queues becomes simpler and more efficient.
Navigating Queues
All queues from the Readymode Starter application are displayed in the Queues table, and are alphabetically sorted in ascending order. To see your queues:
In Readymode iQ, navigate to General > Queues.
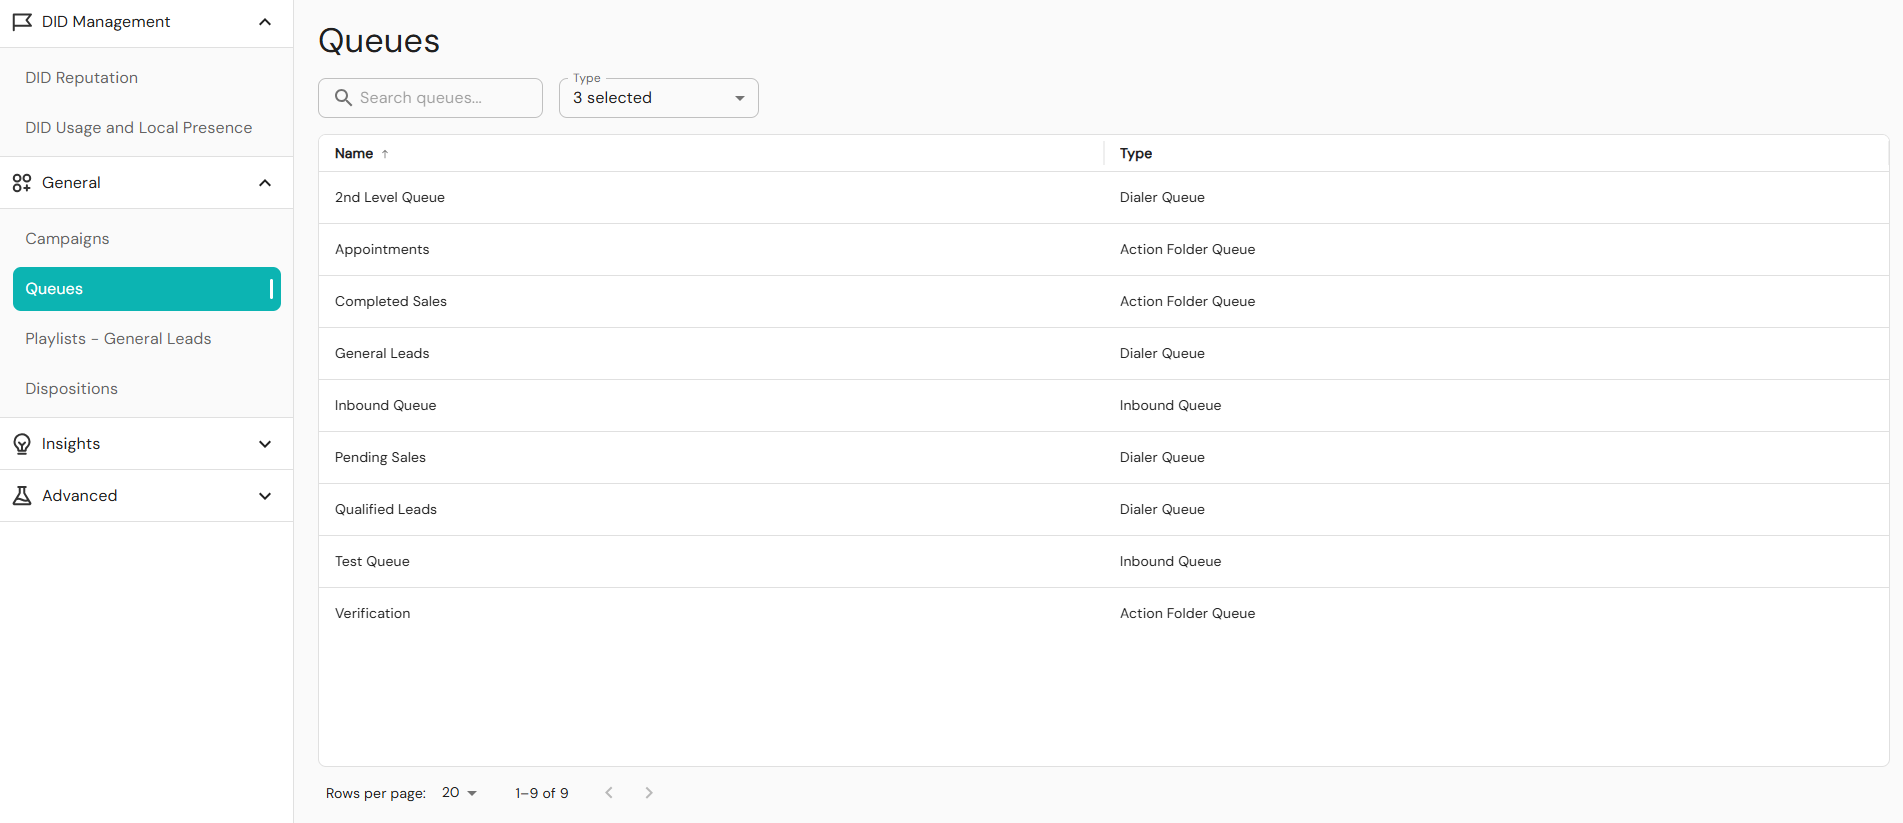
Use the search box to find queues by name. Enter a keyword and press Enter to view results.
The Type dropdown includes Dialer Queue, Inbound Queue, and Action Folder Queue. Select or deselect types to apply to the queue table. Click Select to apply.
Queues labeled “null” are grouped and appear as No Name in the queues table. To avoid complications resulting from improper data labelling, assign each queue a name to ensure correct display.
Use the page navigation controls to move between pages. Each page shows 20 rows by default. Change this to 20–100 rows using the dropdown menu. The setting resets to 20 when you leave and return to the page.
Queue Details Page
To view the details of a queue, click to select it from the queue table. The details page is composed of:
- Outcome type
- Pipeline
Outcome section
Queue outcome types allow your organization to categorize how each queue interaction is resolved. By assigning a standardized outcome type to every resolution reason, the system can generate consistent analytics and reporting across all queues, regardless of naming conventions or business processes.
This ensures clear insights while still giving you full flexibility to define custom resolution labels that make sense for your workflow. When creating or editing a queue resolution reason, you must select one outcome type to classify how a call or interaction ended.
- Success: The customer's need was met or resolved while they were in the queue.
- Callback: The customer will be contacted later or has a scheduled follow-up.
- Other: Any remaining queue outcomes, including transfers, timeouts, abandonments, or other custom exit reasons.
These categories ensure reports remain standardized, even if each queue uses different wording for its resolutions. To configure a queue resolution reason:
- In Readymode iQ, navigate to General > Queues.
- Click to select a queue from the table shown.
- Expand the Outcome Type drop-down and select the type to apply to the queue.
- Click Save.
Pipeline Section
In the queue pipeline section, you can specify a pipeline stage that the call should be classified after it has been transferred to a queue. The default stage for a queue is set to Contact, which assumes the call resulted in a successful customer engagement. However, this stage can be customized to align with your preferred workflow. For more information, contact support@readymode.com. Once a queue is selected, the right panel displays its pipeline setup shown from left-to-right sequence:
Call > Connect > Contact > Convert > Close
Below outlines the possible pipeline stages you can assign to a queue, along with a brief description of each action:
- Call: An attempt was made to reach the prospect, regardless of the result.
- Connect: The call successfully reached a live person or valid endpoint.
- Contact: A qualified decision-maker or target persona was engaged in conversation.
- Convert: The contact agreed to a defined next step (demo, meeting, trial, etc.).
- Close: The opportunity reached an outcome (won, lost, or formally closed).
To select a pipeline stage of your queue:
- In Readymode iQ, navigate to General > Queues.
- Click to select a queue from the table shown.
- Click one stage to assign it to the selected queue.
- Click Save.
Assign a pipeline stage to every queue to improve reporting accuracy. Use meaningful queue names to ensure easy identification and consistent team use. Always remember to save after making changes.
Was this article helpful?
That’s Great!
Thank you for your feedback
Sorry! We couldn't be helpful
Thank you for your feedback
Feedback sent
We appreciate your effort and will try to fix the article